

In the latest version of InfraWorks 360 (“InfraWorks 360 2016 R1” or “The March 2015 Release of Autodesk InfraWorks 360” or whatever they decide to call it) you can now do some traffic simulation! Yes! It’s really cool! This was technology that was acquired not too long ago and was available on Autodesk Labs called “Project Commuter”. This technology is now available in InfraWorks 360 as a preview (which means it might change, might be a cloud credit service, might disappear all together).
In this post, I’ll go over what assets you need in your InfraWorks 360 in order to run a simulation, how to set up your model, how to run the simulation, how to edit the simulation parameters, and finally how to visualize the results.
Needed Assets
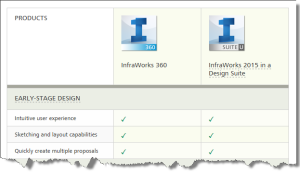
In order to run a traffic simulation, you’ll first need InfraWorks 360. The InfraWorks that ships with the design suites (such as the Infrastructure Design Suite Premium/Ultimate or the Building Design Suite Ultimate). Next, you’ll need the Autodesk Roads and Highways add on for InfraWorks 360. Since we’ll be doing roadway design things, you’ll need the roadway design tools. For more information on what’s in the different InfraWorks offerings, click HERE.
Setup Your Model
Design Roads Only
Prior to running the simulation, you need to set your model up correctly. First of all, your roads need to be design roads and not the preliminary roads. If you’ve created your model from Model Builder, you have preliminary roads. You’ll need to convert those to design roads. Assuming you have the Autodesk Roads and Highways tools activated, you simply select the road, right click, and choose “Convert to Design Road”.

Convert to Design Road
If you don’t see the convert option, make sure you have access to the tools and make sure you’re in Edit Mode (right click and choose Edit Mode).
Online Model
To run the simulation, your model must be upload to the InfraWorks 360 cloud service. If you haven’t done this yet (or haven’t done it since you added the roads), make sure to update your online model. If you aren’t familiar with how to do this, simply click the double arrow in a circle icon at the top left corner of your model.

Publish Model
Run The Simulation
The traffic simulation tool will be found in the Roads and Highways toolset in the analysis tools.

Start the Simulation
After clicking the button for the first time (assuming you haven’t run a simulation before in this model), InfraWorks will ask you to define an area. Basically what you want to do is cross your design roads at the location where you want a traffic load to be located. Your design roads will be highlighted in blue so you can easily see your options. As the area you draw crosses a design road, it creates a traffic load zone (where vehicles come from and where they go to).

Study Area
After drawing the study area, InfraWorks will bring up two asset cards, one for the traffic study area and one for the resulting animation. On the Traffic Study Area asset card, click on Run Simulation. This requires the model already be uploaded to InfraWorks 360 and that you have an active internet connection.

Asset Cards
Once the simulation has been run, your model will show you the results. The results are in the form of bars of different colors. The red bars indicate an excessive wait time or queue length and the blue bars indicate an acceptable wait and queue. If you mouse over one of the bars, it will show you the wait and queue.

Results
Edit Simulation Parameters
Once you’ve run the simulation, you can edit the parameters. Simply choose the study area, right click, and choose “Traffic Analyst Panel”. This will launch the Autodesk InfraWorks 360 Traffic Analyst. Hint: Once you open it, click the TOP button on the view cube to find your model.

Traffic Analyst
A couple things you might want to do, check your traffic loading and check your intersections. To see the traffic demands, go to the Demand menu and choose “Demands”. In the Demand Editor, you can change the demand from one node to another.

Demands
Another thing is to check your intersection configuration. On the Control menu, choose Intersections. In the intersections dialog, choose the intersection you want to edit in the pull down and then choose the turning movement. When you select the turning movement, it will highlight in the main window. Currently, there are control options: stop sign, barred, give way, yield, and free flow. There doesn’t seem to be an option to put in a timed signal but remember, this is a technology preview so I would expect to see it eventually.

Intersections
Once you’ve set your demands and your intersection controls, simply rerun the simulation and your model will update.
Visualize the Results
As mentioned above, you can see the blue and red bars and they will show you the results if they are acceptable or not but, wouldn’t it be nice to actually watch the traffic flow? All you have to do (provided you still have the traffic simulation open in InfraWorks and you’ve run the simulation) is to hit the play button. You can change the display of the results bar to display per lane, per approach, or turn them off.
If you watched the video, you can see it’s a bit dark. This is because currently, the only way to view the results is in the editing mode and everything is darkened while editing. There isn’t any way to show the simulation outside of the editing mode so you won’t be able to show the traffic in a storyboard (at least not yet).
So, did I miss something? Have you played around with it at all? What do you think it still needs? Leave a comment here, I would love to hear your thought!

Are there any plans to enable the viewing of traffic in a storyboard and if so, when? It would be a really useful feature. P
LikeLike
You would need to talk to Autodesk about this. If you are interested in seeing what’s up and coming with InfraWorks, you’ll need to join the InfraWorks Rolling Sandbox.
LikeLike